DIY Vanilla: The "Mother Jar" Method
April 24, 2026 Jax Sterling
- 1 oz Grade A Madagascar vanilla beans
- 8 oz Vodka (35%+ ABV or higher)
- Clean, dry glass Mason jar
- Sharp pairing knife
Let’s face it: store-bought vanilla is a budget-buster and often lacks the depth of the real deal. Why pay premium prices for a tiny bottle when you can curate your own kitchen staple?
By launching a "Mother Jar," you’re creating a permanent, living ecosystem that outlasts your spice rack and improves with time. It’s the ultimate kitchen hack for anyone who values flavor and financial sense.
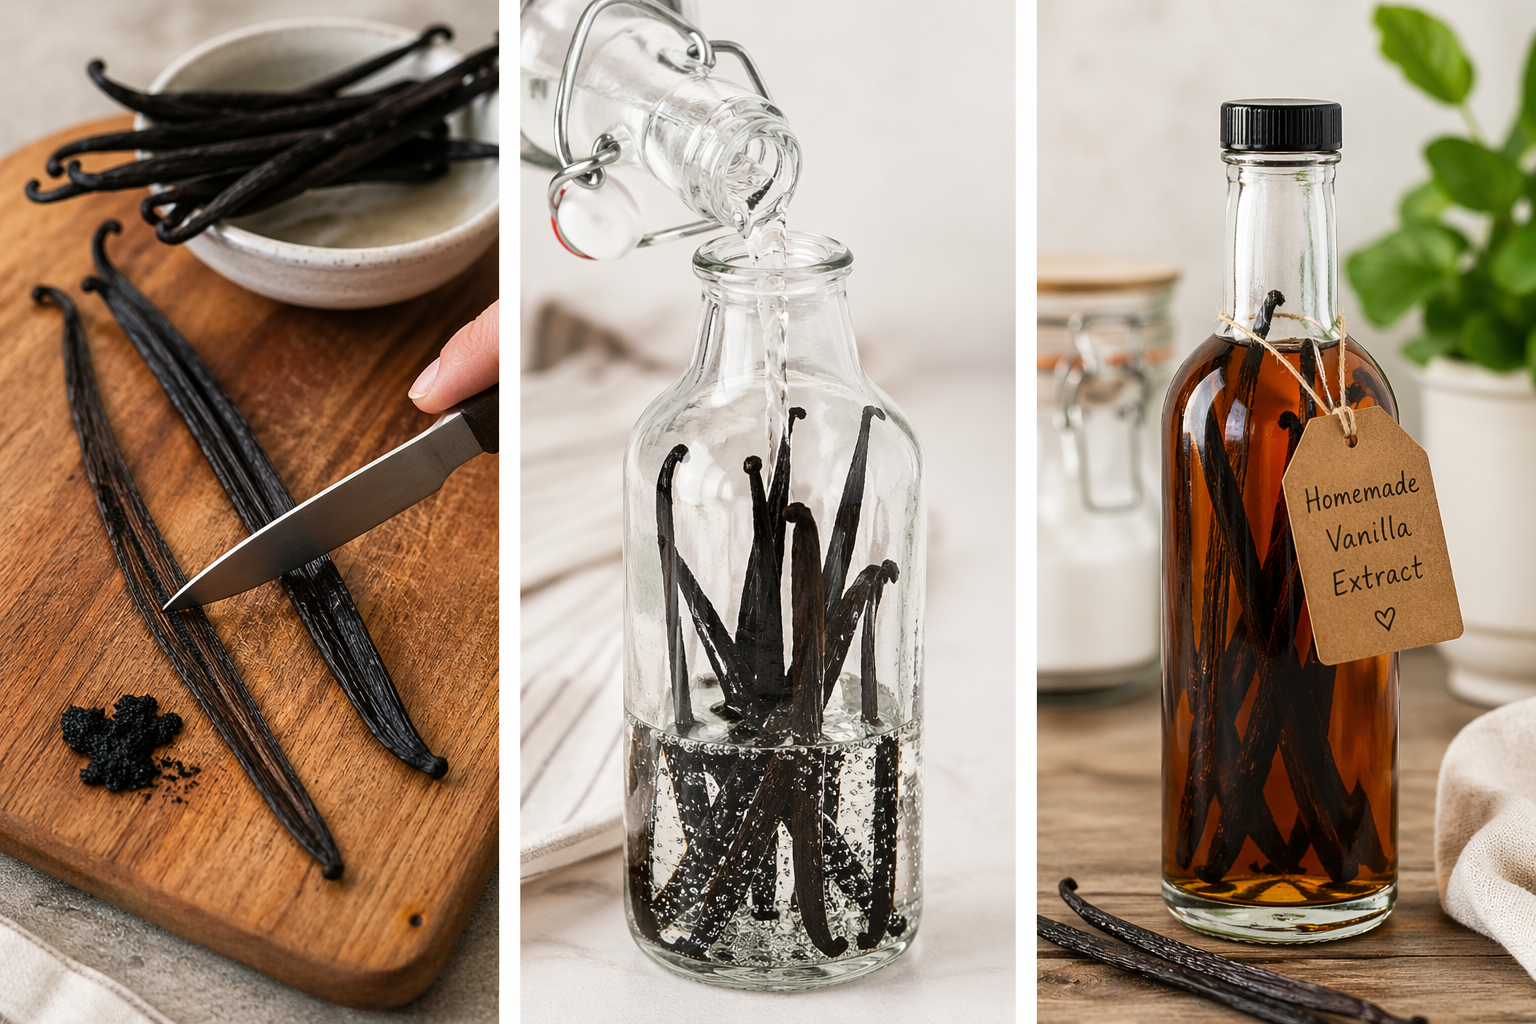
Step-by-Step
- 1
Prep: Slice beans open lengthwise like a book to expose the flavor-packed seeds. Don't skip this—it's where the magic happens.
- 2
Combine: Place the split beans into the jar. Pour the vodka over them until they are completely submerged.
- 3
Store: Seal the lid tight. Hide it in a cool, dark cabinet and shake it gently once a week to keep everything saturated.
- 4
Wait: It’s ready for baking in 8–10 weeks, but remember that patience is your secret ingredient. The longer it sits, the better the flavor.
Community NoteThe Expert's Edge Never drain your Mother Jar past halfway; you need that mature extract to carry the weight of new additions. When you top it off with fresh alcohol, always toss in two new split beans to keep the potency legendary. Finally, keep those beans submerged—air is the enemy of extraction and can cause spoilage.
More DIY Guides